Found a large Tile file Gary, size on the big side but perhaps of better use?Originally Posted by stygg2003

Stygg

 Member
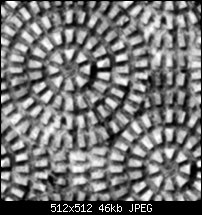
Found a large Tile file Gary, size on the big side but perhaps of better use?
Stygg
 Super Moderator
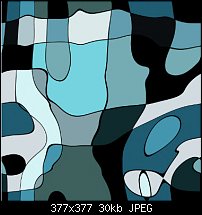
Here's what I'd sort of envisioned for this tile...
...and it wouldn't be a Xara composition without a sports car, eh? ;)
My Best,
Gary
Here's the displacement map I created with a utility called ShaderMap Pro, from the color art. This can be used as a bump channel in Xara to make further visually interesting stuff.
 Member
very nice! great job on the Porshe too! I was trying to remember the name of that program last night
[SIGPIC][/SIGPIC]
My current Xara software: Designer Pro 365 12.6
Good Morning Sunshine.ca | Good Morning Sunshine Online(a weekly humorous publication created with XDP and exported as a web document) | Angelize Online resource shop | My Video Tutorials | My DropBox |
Autocorrect: It can be your worst enema.
Member
Great use of the tile Gary and the car. With or with out the car, the tile now reminds me of many squares in Italy.
 Member
Searching for a tutorial online, I stumbled upon this thread.
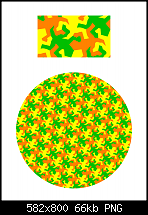
I made my own in a slightly different manner, but I still wanted to share with you.
Created in designer pro X15
If you can put it to use, go right ahead, and thank you all for being awesome!
here it is in use:
and for full res download you can co here:
http://www.anitaphotography.nl/seaml...ndriaan v2.jpg
Super Moderator
Hi Spitsoor
Wow, I barely remember the tutorial! Glad to see some fresh posts here!
Looks good, and I love Mondrian. More structured than Calder. :)
Can you share what you did differently than the steps I proposed?
Moderators need to learn, too!
My Best,
Gary
(1200 by 1200, help yourselves!)
Last edited by Gare; 10 November 2018 at 09:27 PM.
 Member
@Spitsoor
Thanks for bringing this 6 year old thread back to life.
I thought that I would try out your texture in BluffTitler, which I am still trying to figure out, and one result was:
https://youtu.be/X81LaFu16Jg
Your texture reminded me a bit of the Video Pro X 10 splash screen.
I must try out some of the other ones from this thread. Of course, I should also learn how to make my own.
John CB
Xara DPX(19.0.1.65946)
Member
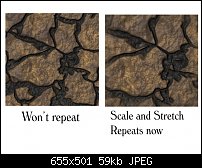
What I did, because I didn't have loose elements, was draw my design first, just made sure to not go over the edges,
then I put rulers in place with two center guides (x and Y) with snap on selected top half, pushed bottom half up, pasted top half at the bottom, again using snap to make sure they were in the right place
did this again with left and right and then all I had left to do was connect the former outsides now in the center to make the pattern whole. created a bitmap and made an object.
then loaded my bitmap into the bitmap fill and selected tiled.
sort of an inverted 4way kaleidoscope if you will.
Super Moderator
Cool!
I must confess that regularly I use Photoshop and its Offset command to turn an image "inside-out" and then correct any flawed parts at the center.
There's also Corel Painter's DEfine Pattern command that is great for painting freeform strokes. When you hit the edge of the window, your stroke continues at the other side of the document.
And, although these are all bitmap tiling solutions, I discovered a fun, inexpensive program ages ago called TextureMaker. It does what you call the "4 way kaleidoscope" among other things.
 Member
Another tiled texture Escher style...
 Posting Permissions

 Reply With Quote


Bookmarks