Interesting details, Stygg, e.g. the small patterns on the rim of the larger circles. Like it!


 Member
Interesting details, Stygg, e.g. the small patterns on the rim of the larger circles. Like it!
Guy -
I love these tools
 Super Moderator
Here's another underplayed one:
 Xara Group Ltd Developer
Here are a couple of simple ones made with the auto-tiler.
Auto-Tiler 3 pattern4.xar
Auto-Tiler 3 pattern2.xar
Phil
Super Moderator
Phil, I just had a play wtih these, and they are way cool!
I'm going to have to do a write-up on Xara Xone on exactly how to use these, and modify them...I'll cull the text from your in-document text.
My Best,
Gary
Moderator
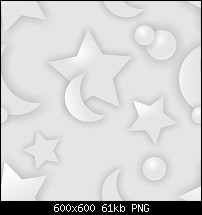
Here's another offering - just made with one square and 9 circles. The brush applied does the rest.
Christine
Repeating Circles.xar
 Member
That's really pretty I like the soft feathery look.
[SIGPIC][/SIGPIC]
My current Xara software: Designer Pro 365 12.6
Good Morning Sunshine.ca | Good Morning Sunshine Online(a weekly humorous publication created with XDP and exported as a web document) | Angelize Online resource shop | My Video Tutorials | My DropBox |
Autocorrect: It can be your worst enema.
Xara Group Ltd Developer
Thanks Gary! I realise they're not artistically very good but I hope people find the ideas useful.
Here are a few tips that I've found while using the auto-tiler:
* You only need three layers at most for any design. The layers are only there to ensure the overlaps between shapes at the edges of the tile are correct and so if you arrange all your bottom left overlaps to be on Layer 1 and top right overlaps on Layer 2 it will work. Shapes in the middle of the tile can be on either layer. Layer 0 is for a simple repeating background. (When shapes don't overlap you don't even need three layers.)
* When you're starting a new design use "Open live copy" to open the live copies and delete the contents and use outline mode so that you can see the background square and avoid deleting it.
* It doesn't matter exactly where you position your shapes when you're using "Open live copy" to start a design. Just put something rough down in roughly the right place and then you can do the fine editing in the main document using select-inside, where you can see the tiling.
* Avoid obvious square repeating by using the square backround shape only as a guide, don't join things along the edges of the square. You can use snapping in the main document to join parts of one tile to the next.
* You can safely change the pixel size of the final tile by altering the dpi in Create Bitmap Copy. It seems that any size tiles OK but it's probably best to stick to simple factors of 96 dpi. So 48dpi will give you a 256*256 tile, for example.
Phil
 Posting Permissions

 Reply With Quote

Bookmarks