


When creating scenes in Blender, it is important to recognize what things MUST be modeled as compared to what things "may" be modeled.
As a quick example, let's say that we are modeling a "panel" and that panel is to have two indented areas, as well as a third indented area, which has raised text in it. Additionally, we want to have text in the larger indented panel, but we don't want that text to stand up off the indented area. (ie. it is flush with it)
We, of course, could model it, but how necessary that is depends on our perspective of the object and how close-up we will actually be to the object.
In this example, we are viewing it from the front and not too terribly close. (generally a good candidate for not having to model every detail)
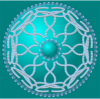
I created the following Bump map in Xara...
The white areas represent the indented sections. Where the word "EXAMPLE" is, will be indented around the text, but the text itself will be basically flush to the rest of the image.
All that was necesssary is adding that image to a texture channel for the plane and setting it to control "Normal" influence. Voila, instant indented sections and protruding text with NO (additional) modeling necessary. [Compare the time it would take to draw that in Xara (3 mins) as opposed to going into the Blender editor and trying to mimic that with control loops and careful positioning and modeling the whole thing.]
Now, we wanted a text on the plane, but we couldn't (easily) just add a Text object in Blender because there will be some amount of protruding, since we won't see it if it doesn't stick up from the surface of the panel. On the other hand, if we use the image below and apply it as a texture, we get the effect we want.
We don't have to worry about positioning (in Blender), because we used the original indentations Bump map (in Xara) in order to line up our text in the large indented section, which will have it in the right location on the Texture map. By deleting all the other objects except the text and then saving it (with alpha!) in Page Save mode rather than Select Save mode (in Xara), it is guaranteed to line-up right where we created it in Xara, but correctly positioned relative to the Bump map previously applied to the Blender object!
Below is that simple panel object that I described earlier and remember that the only modeling done in Blender was adding the plane for the panel and floor and adding a light source. Everything modeled-looking was actually created with 1 bump map and 1 texture map (strictly for the text---the panel was set to red in Materials in Blender, though you could have had the red also in the Texture map).
(Better version without the jpg artifacts is HERE)
Now, depending on the distance of the camera, it is possible that the indentation from the Bump map could have been simply drawn into the Texture map; but if we ever get close or change our perspective, then the indentation lighting will NOT reflect this UNLESS you have done it with a Bump map. (which reacts to lighting and the camera viewing angle)
If you were modeling the bridge of the Enterprise (Star Trek), it would be necessary to model many of the main elements (chairs, control consoles, railings), but the detailed items (ie. control buttons, display screens, flip switches on far-away walls, etc.) can all be done with clever usage of Texture and Bump maps and without a lot of fiddling with the geometry. Many things that aren't in the foreground can be added simply by carefully drawing them (or trimming photos) and saving as a PNG (with Alpha!). Because they are far from the camera, the fact that they are really 2D objects (planes) will not even be an issue as long as you never are seeing them from the side.
If you're showing a dining room and in the far corner is a table with all the places set, you might end up having to model the glassware, but the plates and silverware could easily be a drawing/photo that is simple texture-mapped. [Why create time-consuming geometry if it really isn't needed?]
This tip, more than most others, has the potential of saving a LOT of time in setting up complex scenes and can add a lot of variety, since you will tend to add in more details if you only have to draw them in Xara as opposed to modeling them in 3D space in Blender.
Have fun! Happy Blending!
James

 Reply With Quote
 I love these tools


Bookmarks