Another Blender tutorial to practice some basic material settings

 Member
Another Blender tutorial to practice some basic material settings
Guy -
I love these tools
 Member
I like it.
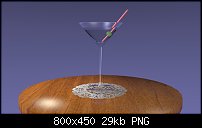
To me, the coolest thing on it is the lace.
The specular hot spot looks a little too hot on the table, but that's a season to taste thing, so it's always only a suggestion!
Take care
James
Member
The lace was a neat trick in the tutorial - it's a image texture on the table, then directed (via mapping) to an empty, which is placed between the table and the glass.
The glass in the tutorial came out a little too plasticky, so I adjusted it using your (James) hints in this forum.
Guy -
Member
Well done.
Re: Empty
Yes, also, when using an empty to control the mapping, there is the potential for much more control. When you map an image texture onto an object, the whole object basically controls the mapping. With the empty, there is much more control in the placement of the texture and in defining the bounds that the texture effects (by location of the empty).
All work along these lines is fruitful, because Materials and mapping Textures are a major, major element in 3D work, as important as the modeling itself.
Most of the functions in Blender are understandable with some referencing and a little study. Still, manually unwrapping meshes for applying textures to irregular objects is one of the tougher things to have to do. If it's not necessary, avoid it at all costs.
One tip... the sphere mapping works excellently on many objects that are NOT spheres...very often better than the flat wrapping. If you have an irregular shaped stone (for example) often the sphere mapping is convincing, where the flat mapping isn't because of the errors at the edges of the object where everything appears to be stretched.
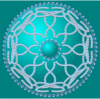
One other little tip is the other procedural textures. They work very very well and can quickly help make things have a textured effect like it's an actual complex material rather than just a simple color mapped to it.
In the object below (posted before), if you look closely at the orangish surface, you can see that it has detailing... it's subtle, but I think it adds a lot. However, the point is... using procedural textures with spherical mapping makes the texturing look right where it would have been more difficult to try to do this with a normal image texture and get it to seem like it follows the surface correctly.
Peace
James
Last edited by ODdOnLifeItself; 01 October 2011 at 11:39 AM.
 Posting Permissions

 Reply With Quote
Bookmarks